I have been testing different ways of making baby booties. This type is quick to knit and easy to create different looking booties.
This pair is in my favourite colours, in shades of pink and lilac.
I have looked at different patterns for making booties to come up what I find nice-looking and quick to make.
You begin knitting in the middle of the sole. The bootie can be knitted entirely on two needles and sewn together at the end, or you can take double pointed needles and knit the cuff on the round. I like doing it that way.
Yarn: I have used Gjästal Maija or Novita Nalle - any yarn that is about 130 m/50 g (142 yd/1.75 oz) (Doubleknitting weight)
Knitting needles 3,5 mm (US size 4)
Gauge: 21s = 10cm (4 in)
The finished lenght of the sole is 9 cm (3½ in).
The pattern is for this bootie, the other photos here have some things added to them:
Abbreviations:
st/sts = stitch/stitches
k = knit
p = purl
Stockinette = Knit on the right side of work, purl on the wrong side
Garter stitch: knit both on the right and wrong sides
p2tog = purl 2 stitches together
yo = yarn over
k2tog = knit 2 stitches together (=right-slanting decrease)
[sl1, k1, psso] = Slip one stitch, knit the next, pass the slipped stitch over the knit one. (=left-slanting decrease)
Increasing: knit the same stitch twice, first the front side of the stitch, then the back side.
Sole:
Made in garter stitch.
Cast on 30 sts.
Row 1: Increase by knitting 1st st twice, k 13, k next 2 sts twice, k 13, k last st twice (you have 34 sts)
Rows 2-3: knit (garter st)
Row 4: Knit 1st st twice, k 15, knit next 2 sts twice, k 15, knit last st twice (you have 38 sts)
Rows 5-6 krs: Knit (garter st)
7. krs: Knit 1st st twice, k 17, knit next 2 sts twice, k 17, knit last st twice (you have 42 sts)
8. krs: Knit
Picot edging
Change to different colour yarn.
Row 1: Purl
Row 2: Knit
Row 3: *p2tog, yo*, repeat from * to * until 2 sts left. Purl them together.
Row 4: Knit
Row 5: Purl
Row 6: Fold work at eyelet row. Pick up the first loop of first row on different colour and knit together with working stitch. Repeat to end of row..
Alternately, if you find it difficult to pick stitches and knit them together, you can sew the picot edging afterwards.
This photo below shows the finished sole and half of the picot edging has been done.
Side of foot
After finishing th epicot edge knit stockinette for 8 rows.
Top of foot (decreases that make the form of the foot part)
Stockinette.
1. krs: k 23 , [sl1, k1, psso] , turn work (to go back without finishing the row)
2. krs: p 6, p2tog, turn work.
3.krs: k 6, [sl1, k1, psso] , turn work.
Continue the same way until 12 sts left on both sides of the centre part with decreases (31 sts altogether). Purl last decrease row to end of row without turning.
2 more rows of stockinette.
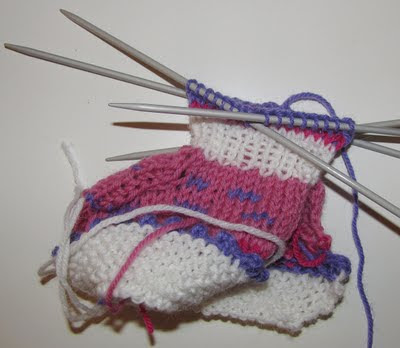
Photo below: Decreases of the top of the foot partly done.
Cuff
Ribbing: k1 p1 for 14 rows. Bind off sts.
(If you make the cuff on the round, increase 1 st before starting cuff to get even number of sts for ribbing.)
Here the finished piece before sewing the back together:
Sew up a seam for the sole and back. Use threads left from the knitting if they are long enough.
If you prefer, you can knit the cuff part in the round on double pointed needles. I do it this way.
The green and white bootie is a variation of the same pattern. The side of the foot is in garter stitch and the top of the foot is ribbing. I made a separate piece for the strap and sewed it on. It is 12 stitches and 3 rows.


